Scikit-Image - Basic Image Processing Operations
Table of Contents
- Introduction
- Loading Images as Numpy Array
- Reading Images From Disk
- Saving Images to Disk
- Separating Image into Bands
- Modifying Images By Modifying Numpy Array
- Converting Image from One Format to Another
- Converting Image from One Mode to Another
- Rescale Images
- Resize Images
- Rotate Images
- References
Introduction 
Scikit-Image is a python library that provides various tools to handle, process, and transform images. Scikit-Image lets us work with the bulk of images which is quite a common requirement for working with image classification or object detection in machine learning. Scikit-Image is built on top of scipy hence it considers all images as numpy arrays. We can easily load any images and it'll be available as numpy array which we can modify to reflect changes on images.
As a part of this tutorial, we'll introduce basic image processing like loading bulk images, separating channels, rescale images, resize images, rotate images, etc. We'll be introducing io, transform, and color modules of scikit-image as a part of this tutorial.
We'll start by importing all the necessary libraries.
import skimage
from skimage import data
from skimage import io
from skimage import transform
from skimage import color

import matplotlib.pyplot as plt

import sys
import warnings
warnings.filterwarnings("ignore")
print("Python Version : ", sys.version)
print("Scikit-Image Version : ", skimage.__version__)
Loading Images as Numpy Array 
We'll be loading a few images which come by defaults with the scikit-image library as a part of the data module. We'll then explore datatype, size, etc of these images.
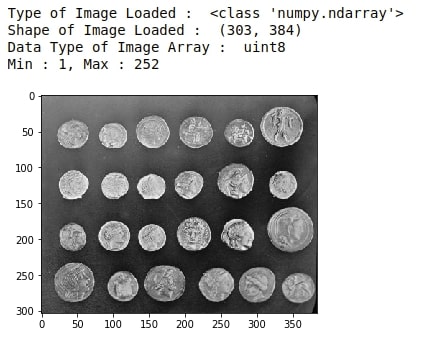
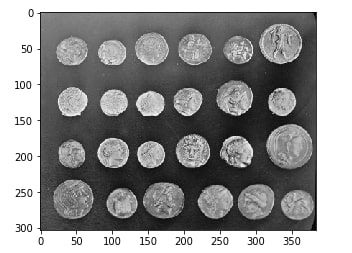
Below we have loaded coins image which is a grayscale image. It's loaded as a numpy array of size 303 x 384 and has integer values between 1-252.
coins = data.coins()

print("Type of Image Loaded : ", type(coins))
print("Shape of Image Loaded : ", coins.shape)
print("Data Type of Image Array : ", coins.dtype)
print("Min : %d, Max : %d"%(coins.min(), coins.max()))

plt.imshow(coins, cmap='gray');
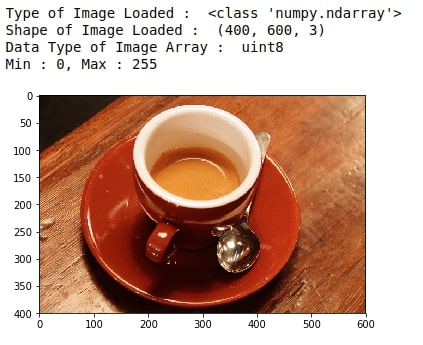
Below we have loaded coffee image which is an RGB image. It's loaded as a numpy array of size 400 x 600 x3 and has integer values between 0-255. It has 3 values for each entry of 400 x 600 which represents R, G, and B channel values for the image. All three-channel values combined to generate an RGB image.
coffee = data.coffee()

print("Type of Image Loaded : ", type(coffee))
print("Shape of Image Loaded : ", coffee.shape)
print("Data Type of Image Array : ", coffee.dtype)
print("Min : %d, Max : %d"%(coffee.min(), coffee.max()))

plt.imshow(coffee);
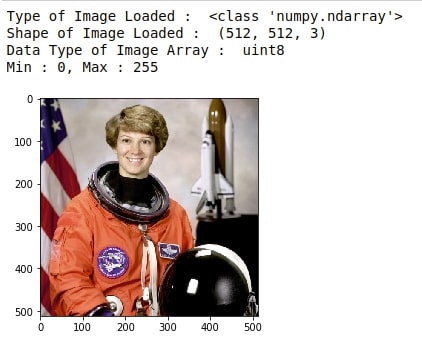
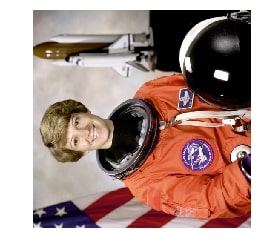
The third image that we loaded is astronaut image which is again RGB image of size 512 x 512 x 3 having integer values between 0-255.
astronaut = data.astronaut()

print("Type of Image Loaded : ", type(astronaut))
print("Shape of Image Loaded : ", astronaut.shape)
print("Data Type of Image Array : ", astronaut.dtype)
print("Min : %d, Max : %d"%(astronaut.min(), astronaut.max()))

plt.imshow(astronaut);
Reading Images From Disk 
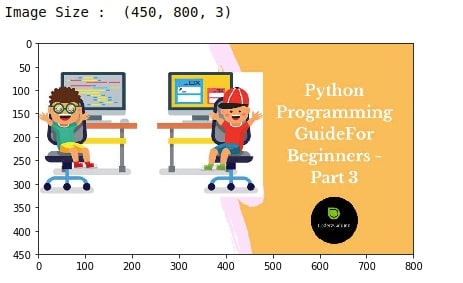
The scikit-image has a module named io which lets us read images of different types (jpg, png, tiff, etc) from disk. It provides methods to read a single image of a bunch of images that satisfy particular Unix path matching patterns. Below we have explained using examples where we have loaded a single image from disk using imread() method of io module.
python_tutorial = io.imread('Python Programming GuideFor Beginners - Part 3.jpg')
print("Image Size : ", python_tutorial.shape)

io.imshow(python_tutorial);
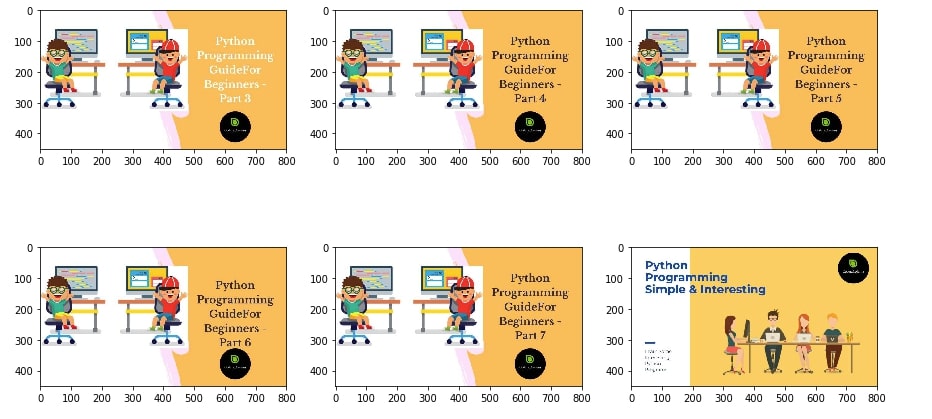
The io module provides a method named imread_collection() which accepts a list of files to be read from disk or Unix style path matching pattern. It does not load all images immediately in memory but it reads image only when its called, till then it just maintains a list of image names as an array.
python_tutorials = io.imread_collection("*.jpg")
python_tutorials.files
for idx, image in enumerate(python_tutorials):
    print("Image %d Size : "%(idx+1), image.shape)
The io module also provides imshow() and imshow_collection() methods to display single and collection of images respectively.
fig = io.imshow_collection(python_tutorials);
fig.set_figwidth(15)
fig.set_figheight(8)
imgs = io.imread_collection("*.jpg:*.png")
imgs.files
Saving Images to Disk 
The io module provides a method named imsave() which can be used to save the image to disk. Below we have explained its usage with example.
io.imsave("Astronaut.jpg", astronaut)
io.imsave("Coffee.png", coffee)
Separating Image into Bands 
As images read using scikit-image are all numpy array where the third dimension is a channel, we can easily separate red, green, and blue channels of RGB image. Below we have separated all channels of RGB image and showing them on screen separately.
r = astronaut[:,:,0]
g = astronaut[:,:,1]
b = astronaut[:,:,2]

fig, (ax1,ax2,ax3, ax4) = plt.subplots(nrows=1, ncols=4, figsize=(15,4))

ax1.imshow(r, cmap="gray")

ax2.imshow(g, cmap="gray")

ax3.imshow(b, cmap="gray")

ax4.imshow(astronaut);
Modifying Images By Modifying Numpy Array 
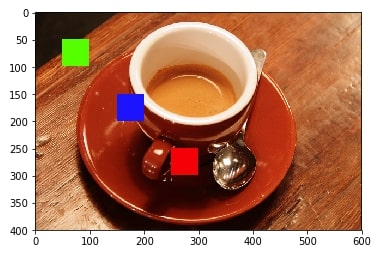
We can easily modify images by replacing values of numpy array when using scikit-image. Below we are creating three squares of the color red, green, and blue by replacing existing values with the highest value of particular channel (red, green & blue).
coffee2 = coffee.copy()

coffee2[50:100,50:100, :] = [0, 255, 0]

coffee2[150:200,150:200, :] = [0, 0, 255]

coffee2[250:300,250:300, :] = [255, 0, 0]

plt.imshow(coffee2);
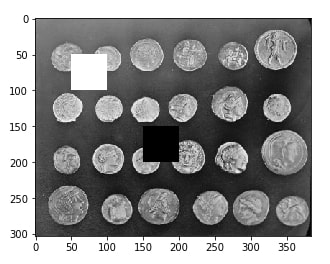
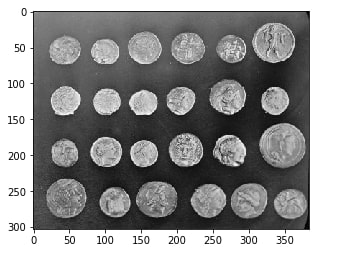
coins2 = coins.copy()

coins2[50:100, 50:100] = 255
coins2[150:200, 150:200] = 0

plt.imshow(coins2, cmap="gray")
Converting Image from One Format to Another 
The scikit-image uses a numpy array to represent images. It represents images either as numpy integer array of values between 0-255 or as numpy float array of values between 0-1. We can easily convert images from one format to another by using various methods available with scikit-image. Below is a list of scikit-image methods that accepts image and transfer it to particular format like int, floats, etc.
img_as_float()- Converts image to float format.img_as_float32()- Converts image to numpy float 32-bit format.img_as_float64()- Converts image to numpy float 64-bit format.img_as_bool()- Converts image to boolean format.img_as_ubyte()- Converts image to unsigned byte 8-bit format.img_as_uint()- Converts image to unsigned int of 16-bit format.
coins_float = skimage.img_as_float32(coins)

print("Coins Array Data Type : ", coins_float.dtype)

coins_float[:5,:5]
plt.imshow(coins_float, cmap="gray");
coins_uint = skimage.img_as_uint(coins_float)

print("Coins Array Data Type : ", coins_uint.dtype)

coins_uint[:5, :5]
plt.imshow(coins_uint, cmap="gray");
Converting Image from One Mode to Another 
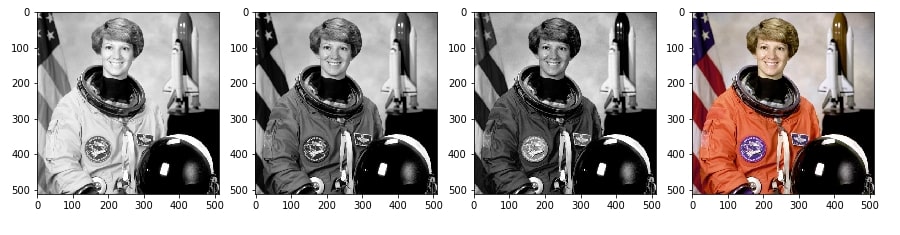
The color module of scikit-image provides various methods that accept image numpy array as input and convert it to a different mode from the existing one. We can convert RGB image to greyscale, RGB to HSV, HSV to RGB, etc.
Below we have explained the usage of few methods for explanation purposes.
astronaut_gray = color.rgb2gray(astronaut)

print("Transformed Image Shape : ", astronaut_gray.shape)

astronaut_grey = color.rgb2grey(astronaut)

print("Transformed Image Shape : ", astronaut_grey.shape)

astronaut_hsv  = color.rgb2hsv(astronaut)

print("Transformed Image Shape : ", astronaut_hsv.shape)

fig, (ax1,ax2,ax3, ax4) = plt.subplots(nrows=1, ncols=4, figsize=(15,4))

ax1.imshow(astronaut_gray, cmap="gray")
ax1.axis("off")

ax2.imshow(astronaut_grey, cmap="gray")
ax2.axis("off")

ax3.imshow(astronaut_hsv)
ax3.axis("off")

ax4.imshow(astronaut);
ax4.axis("off");
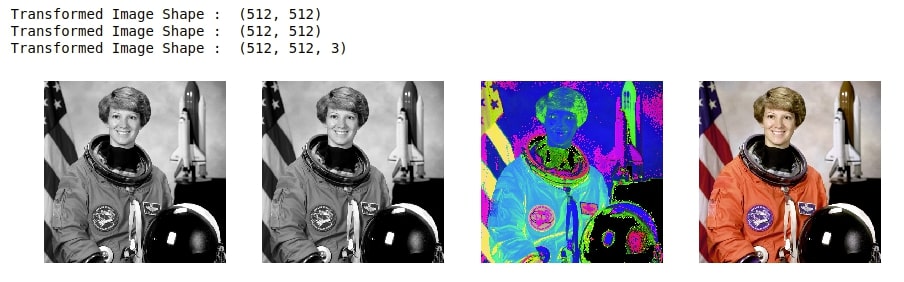
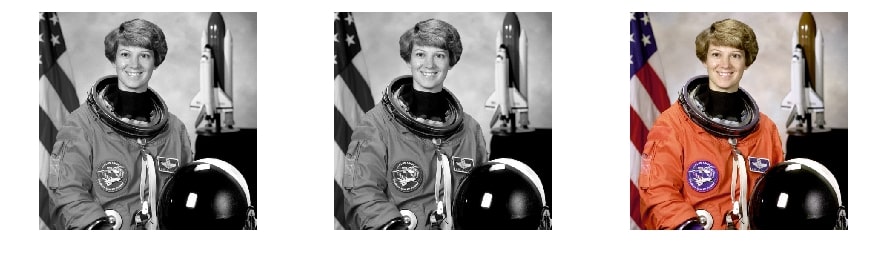
We can easily convert RGB image to grayscale image by combining red, green, and blue channels into one channel. As ideally, a person would think that red, green, and blue channels have equal contributions to the generation of RGB image but that is not true. The human eye recognizes green color more than any other color. Hence the contribution of the red, green, and blue channels is different when creating a grayscale image and not equal. We are below creating 2 grayscale images where we combine red, green, and blue channels by using equal proportion and then using proportion where green channel contributes more.
astronaut_gray1 = astronaut @ [1/3, 1/3, 1/3]
astronaut_gray2 = astronaut @ [0.2126 , 0.7152 , 0.0722]

fig, (ax1,ax2,ax3) = plt.subplots(nrows=1, ncols=3, figsize=(15,4))

ax1.imshow(astronaut_gray1, cmap="gray")
ax1.axis("off")

ax2.imshow(astronaut_gray2, cmap="gray")
ax2.axis("off")

ax3.imshow(astronaut)
ax3.axis("off");
python_tutorial_gray1 = python_tutorial @ [1/3, 1/3, 1/3]
python_tutorial_gray2 = python_tutorial @ [0.2126 , 0.7152 , 0.0722]

fig, (ax1,ax2,ax3) = plt.subplots(nrows=1, ncols=3, figsize=(15,4))

ax1.imshow(python_tutorial_gray1, cmap="gray")
ax1.axis("off")

ax2.imshow(python_tutorial_gray2, cmap="gray")
ax2.axis("off")

ax3.imshow(python_tutorial)
ax3.axis("off");

Rescale Images 
We can easily rescale images using the rescale() method of the transform module from the scikit-image. It accepts image numpy array and scale size. It returns a new image scaled according to scale size passed to it.
python_tutorial_rescaled = transform.rescale(python_tutorial, scale=1.5)

print("Image Size Before Rescaling : ",python_tutorial.shape)
print("Image Size After Rescaling : ",python_tutorial_rescaled.shape)
astronaut_rescaled = transform.rescale(astronaut, scale=2.0)

print("Image Size Before Rescaling : ", astronaut.shape)
print("Image Size After Rescaling : ", astronaut_rescaled.shape)
astronaut_rescaled = transform.rescale(astronaut, scale=0.5)

print("Image Size Before Rescaling : ", astronaut.shape)
print("Image Size After Rescaling : ", astronaut_rescaled.shape)
Resize Images 
We can resize existing images by using the resize() method transform module of scikit-image. It accepts image numpy array and output shape expected of image and transforms it to that size.
astronaut_resized = transform.resize(astronaut, output_shape=(100,100))

print("Image Size Before Rescaling : ", astronaut.shape)
print("Image Size After Rescaling : ", astronaut_resized.shape)
python_tutorial_resized = transform.resize(python_tutorial, output_shape=(100,100))

print("Image Size Before Rescaling : ",python_tutorial.shape)
print("Image Size After Rescaling : ",python_tutorial_resized.shape)
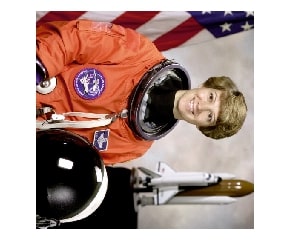
Rotate Images 
We can easily rotate images as well using the rotate() method of the transform module of scikit-image. It accepts image numpy array and angle by which we want to rotate the image and then returns the image rotated by that angle.
astronaut_rotated = transform.rotate(astronaut, angle=90)

plt.imshow(astronaut_rotated)
plt.axis("off");
astronaut_rotated = transform.rotate(astronaut, angle=-90)

plt.imshow(astronaut_rotated)
plt.axis("off");
References 
 Sunny Solanki
Sunny Solanki
Intro: Software Developer | Youtuber | Bonsai Enthusiast
About: Sunny Solanki holds a bachelor's degree in Information Technology (2006-2010) from L.D. College of Engineering. Post completion of his graduation, he has 8.5+ years of experience (2011-2019) in the IT Industry (TCS). His IT experience involves working on Python & Java Projects with US/Canada banking clients. Since 2020, he’s primarily concentrating on growing CoderzColumn.
His main areas of interest are AI, Machine Learning, Data Visualization, and Concurrent Programming. He has good hands-on with Python and its ecosystem libraries.
Apart from his tech life, he prefers reading biographies and autobiographies. And yes, he spends his leisure time taking care of his plants and a few pre-Bonsai trees.
Contact: sunny.2309@yahoo.in


![YouTube Subscribe]() Comfortable Learning through Video Tutorials?
Comfortable Learning through Video Tutorials?
If you are more comfortable learning through video tutorials then we would recommend that you subscribe to our YouTube channel.
![Need Help]() Stuck Somewhere? Need Help with Coding? Have Doubts About the Topic/Code?
Stuck Somewhere? Need Help with Coding? Have Doubts About the Topic/Code?
 Stuck Somewhere? Need Help with Coding? Have Doubts About the Topic/Code?
When going through coding examples, it's quite common to have doubts and errors.
If you have doubts about some code examples or are stuck somewhere when trying our code, send us an email at coderzcolumn07@gmail.com. We'll help you or point you in the direction where you can find a solution to your problem.
You can even send us a mail if you are trying something new and need guidance regarding coding. We'll try to respond as soon as possible.
![Share Views]() Want to Share Your Views? Have Any Suggestions?
Want to Share Your Views? Have Any Suggestions?
 Want to Share Your Views? Have Any Suggestions?
If you want to
- provide some suggestions on topic
- share your views
- include some details in tutorial
- suggest some new topics on which we should create tutorials/blogs
 scikit-image, basics